Play Chords in Ableton Live with MIDI Clips
Not every creative is a god at the white and black keys. Especially the understanding of chords and scales can be quite complicated for some beginners. But the good thing is you can build an easy setup to play chords in Ableton Live.
In this tutorial we use some MIDI clips, each containing only one chord with a duration of one measure. Four or five chords often can be sufficient for many compositions as long as they play in the same scale. Each chord will be triggered by only one key or midi controller.
1. prepare your MIDI clips
First of all you need chord clips which can be imported into your project. "Subaqueous" already prepared a selection of clips, which are sorted by major and minor scales. Get his collection for free (or donation) right here:
Download via "Subaqueous / GUMROAD"
You can save the folder in your "User Library" and use the browser to find the right key. After that drag&drop all midi clips from one folder into your project.
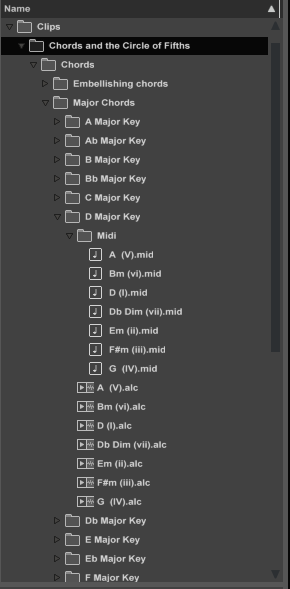
The download link offers a collection of midi clips - sorted by scale.
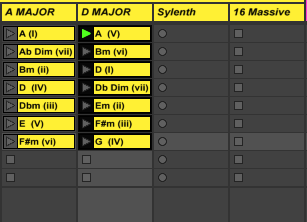
Prepared MIDI clips for the key of "A Major" and "D Major" have been loaded onto different clip slots.
2. assign the clips
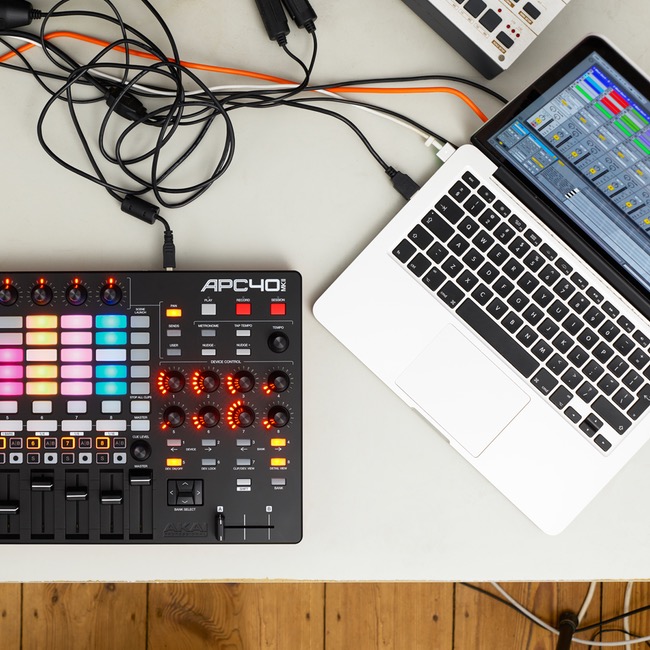
To play these clips in real-time, you should assign them to the computer keyboard or a MIDI controller. To do this, simply activate the "Key" or "MIDI" buttons at the top right of the window, select a clip and then press the desired button.
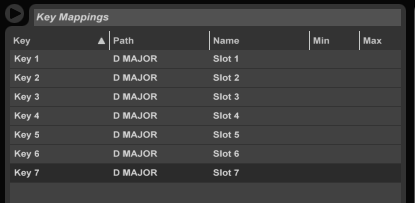
Seven different midi clips have been assigned to individual keys on the computer keyboard. This works also with midi controllers!
3. check quantization and launch mode
The clip start depends on the quantization, which can defined globally or individually per clip. The standard measure is one bar. It can be very useful to temporarily reduce this value in the quantization menu at the top left, perhaps to "1/8" or "1/16", to enable faster chord changes.
Alternatively you can leave the global quantization as it is and change this parameter only for your chord clips. To select all clips in one channel click the first clip in the first clip slot and the click on the last clip while holding down the [Shift] key. Now have a look at the "Launch Box" in the clip view below. You can change the "quanization" of the selected clips from "global" to another measure, e.g. "1/16".
Also you can change the "Launch Mode" from "Trigger" to "Gate". In this mode the clip will not play for the whole duration but only as long as you hold down the assigned controller/key.
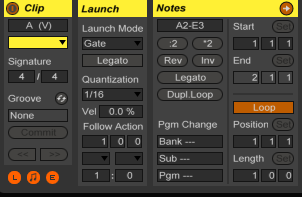
The tab "Launch" offers useful parameters for triggering clips.
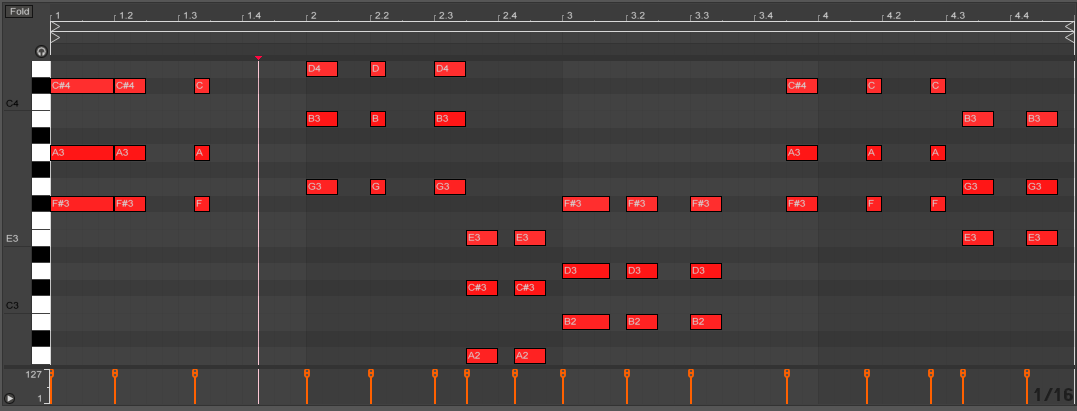
4. record your performance
Now you are able to play chords in Ableton Live in a very simple way - only by using your assigned controllers/keys. By clicking on the "Arrangement recording key" you can capture your performance in the Arrangement view.

The Arrangement view shows all recorded chords.
5. consolidate
For better handling, you should select the desired range, for example four or eight bars, and then select the command "consolidate" after a right-click on the clips. Live combines all the snippets into one single clip, which can be dragged back into the session view.
After consolidating your performance...